
Wheelie a Kukirin Escooter Simulator Delivery Jobs
Build Courier 100 with loops that still double Cash from wheelies.
Deliveries in the income stack
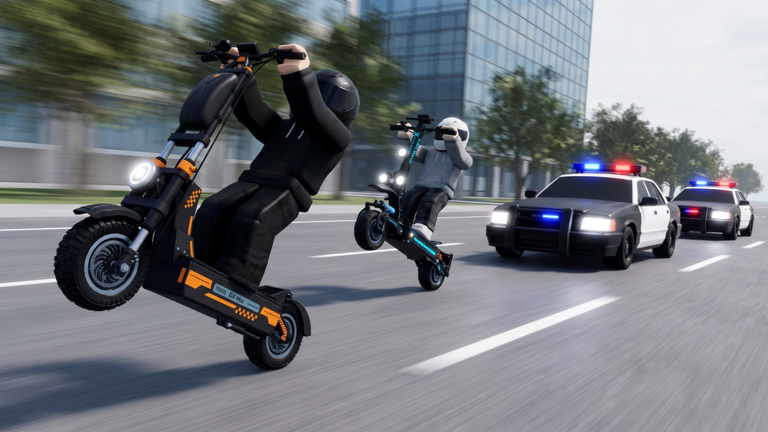
Delivery jobs are the steady middle layer of Wheelie a Kukirin: Escooter Simulator’s economy. You earn Cash every second you ride, double it while wheelieing, and collect a lump sum when a package drops. Completing 100 deliveries unlocks Courier 100 on the Players Hub. Done right, jobs never fight your wheelie farm—they ride along the same pavement.
This page shows how to pick jobs, route them through the map districts, and stack them with codes without wasting 2x timers.
How delivery jobs work
- Spot a job marker on the HUD or world.
- Accept / pick up the package when prompted.
- Ride to the drop while keeping income ticking.
- Complete the hand-off for the lump payout.
- Immediately scan for the next nearby marker.
You do not need to cancel wheelie income to deliver. Hold the front wheel on long Port and Beach segments, then set down briefly for tight Old Town corners if needed. Crash animations and busted police outcomes cancel more progress than a short grounded stretch.
Courier 100 strategy
Courier 100 is a volume badge. Optimize for completions per hour, not for the single fattest payout:
- Prefer short Downtown ↔ Port ↔ Beach triangles over cross-map Hills hauls on a weak motor.
- Chain jobs that start near where the last one ended.
- Count progress mentally in sets of ten so sessions feel finite.
- Mix race nights and chase practice on alternate days so you do not burn out on pure job spam.
If you are still on the Ninebot F, deliveries teach the city while you save for a Rare (tier list). After Rare, keep delivering in the background—do not abandon Courier just because bounties look shinier.
Best early loop
| Step | District | Action |
|---|---|---|
| 1 | Downtown | Grab the nearest package |
| 2 | Port | Wheelie the long straight toward the drop |
| 3 | Beach | Finish coastal drops; refresh with a new marker |
| 4 | Suburbs | Use connectors only when the next job forces it |
| 5 | Downtown | Reset the triangle |
Skip Hills and deep Old Town until Pit Stop tires and motor can hold speed. One City Explorer tour can touch those districts; daily Courier grinding should live on friendly pavement.
Stacking with codes and 2x Cash
When RACEDAY, USUIPASS, KUKIRIN, or TOUGEKING’s multiplier is active:
- Accept a delivery only if the route stays on Port/Beach/Downtown pavement you already planned to wheelie.
- Ignore distant Hills markers—travel time burns the buff.
- Do not open the shop or linger in Pit Stop menus mid-timer.
- After the buff ends, clear whatever awkward job you postponed.
Flat Cash from codes (especially TOUGEKING’s 118) should buy motor/tires or the next scooter grade, not cosmetics. Faster bikes shorten every future delivery.
Deliveries during police heat
Low heat is fine—keep the package and ride. High heat is a decision tree:
- 1–2 stars: finish the nearby drop, then cool off.
- 3–4 stars: only continue if your escape line is rehearsed (Police Chases).
- 5 stars / WANTED raids: park the Courier goal; play for bounty or reset. Getting Busted! with a package mid-route wastes both systems.
WANTED event windows (bounties and police raids—see Updates) are poor Courier nights unless you specifically want chaos. Schedule clean delivery sessions outside peak raid hours.
When to skip a job
Skip or defer when:
- The drop sits deep in Hills on an undertuned motor
- Old Town corners stack and your tires are stock
- A 2x code has under two minutes left and the marker is across the map
- You are queued for an Airfield drag and need focus
- Seasonal pumpkin/lantern hunts are live and the job pulls you away from a dense collectible cluster
Skipping is skill. Bad jobs lower Courier rate more than waiting ten seconds for a better marker.
Pit Stop and scooter choices for couriers
- Motor — keeps average speed high between markers.
- Tires — prevents crash resets in Old Town.
- Controller — smooths throttle when you re-enter a wheelie after a drop.
- Grade — Rare and above raise Cash/sec so every meter between jobs pays more.
A tuned Rare courier often out-earns an untuned Legendary that tip-overs every corner. Re-read Pit Stop Upgrades if deliveries feel slower after a “upgrade.”
Sample Courier session (25 minutes)
- Redeem one code if a fresh 2x is available.
- Run the Downtown → Port → Beach triangle for 15 minutes.
- Spend two minutes on a Pit Stop only if a part upgrade is affordable.
- Finish with a Suburb connector sweep or a single Airfield scout if race Cash is needed next.
- Log approximate delivery count; note which district wasted time.
Repeat until Courier 100 pops, then keep light delivery habits forever—jobs remain free Cash on roads you already ride.
Related pages
Courier 100 is a marathon built from short, smart loops. Keep packages on cash roads, stack buffs carefully, and let every delivery double as map practice.
Frequently Asked Questions
Quick answers about codes, wheelies, chases, and scooter upgrades.
How many deliveries for Courier 100?
Complete 100 delivery jobs. Track progress in the badge menu and favor short district loops over cross-map hauls.
Do deliveries pause riding Cash?
No. You still earn per-second Cash while carrying a package, and wheelies still double that income on open roads.
Should I deliver during a 2x code?
Yes only if the drop stays on your planned Port/Beach/Downtown wheelie route. Skip distant markers until the timer ends.
Which district is best for jobs?
Downtown, Port, and Beach form the strongest early triangle. Unlock Hills and heavy Old Town routes after motor and tire upgrades.
What if police interrupt a delivery?
Finish low-heat drops, but abandon Courier focus during five-star or WANTED chaos so you can escape cleanly for bounty value instead.